Showing posts with label MariaDB. Show all posts

Thursday, 25 October 2018

How to Setup phpMyAdmin in an iocage Jail on FreeNAS 11.1

بسم الله الرحمن الرحيم


Abstract


Tutorial on how to setup phpMyAdmin in an iocage Jail on FreeNAS 11.1.


Assumptions and Prerequisites


  • OS: FreeNAS 11.1-U6
  • FreeNAS Host: fn
  • FreeNAS Network Interface: igb0
  • FreeNAS IP: 10.0.0.2
  • FreeNAS Subnet Mask: 24
  • Jail Container: iocage
  • iocage Version: 1.0 Alpha
  • Jail Release: 11.1-RELEASE
  • Jail Name: test
  • Jail Network Interface: vnet0
  • Jail Network Config: DHCP
  • Jail Default Route: 10.0.0.1
  • IP Version: IPv4
  • Bridge Network Interface: bridge0
  • DNS 1: 10.0.0.1 
  • Domain: example.com
  • ZPool Volume: tank
  • Database: MariaDB v10.2.17
  • Web Server: NGINX v1.14.0_12
  • Web Directory: /usr/local/www/html
  • PHP Version: 7.2
  • phpMyAdmin Version: 4.8.3
  • Setup iocage Jail
  • Setup NGINX Web Server
  • Setup MariaDB 


Install phpMyAdmin


Since we are using php72 on the nginx webserver, we will install phpMyAdmin for the php72 version
root@test:~ # pkg install phpMyAdmin-php72


Create a Symbolic Link to the phpMyAdmin directory into the webroot directory
root@test:~ # ln -s /usr/local/www/phpMyAdmin /usr/local/www/html/phpmyadmin

Restart nginx and php-fpm service
root@test:~ # service nginx restart; service php-fpm restart


Configure phpMyAdmin 


Edit the /usr/local/www/phpMyAdmin/config.inc.php file and configure phpMyAdmin settings or delete the /usr/local/www/phpMyAdmin/config.inc.php and then go to http://test/phpmyadmin/setup to configure a database server host. For our example, I am going to use the phpMyAdmin setup wizard.

First delete /usr/local/www/phpMyAdmin/config.inc.php file
root@test:~ # rm -v /usr/local/www/phpMyAdmin/config.inc.php


Go to http://test/phpmyadmin/setup and configure a database server host


Copy the text of the generated configuration file and then paste it into the /usr/local/www/phpMyAdmin/config.inc.php file


Paste the config text into /usr/local/www/phpMyAdmin/config.inc.php and Save File
root@test:~ # ee /usr/local/www/phpMyAdmin/config.inc.php


Login to phpMyAdmin


Go to http://test/phpmyadmin in your browser and login using your root username and password.


Resource Links

Wednesday, 24 October 2018

How to Setup a MariaDB Server v10.2 in an iocage Jail on FreeNAS 11.1

بسم الله الرحمن الرحيم


Abstract


Tutorial on how to setup MariaDB Database Server v10.2.17 in an iocage Jail on FreeNAS 11.1.


Assumptions and Prerequisites


  • OS: FreeNAS 11.1-U6
  • FreeNAS Host: fn
  • FreeNAS Network Interface: igb0
  • FreeNAS IP: 10.0.0.2
  • FreeNAS Subnet Mask: 24
  • Jail Container: iocage
  • iocage Version: 1.0 Alpha
  • Jail Release: 11.1-RELEASE
  • Jail Name: test
  • Jail Network Interface: vnet0
  • Jail Network Config: DHCP
  • Jail Default Route: 10.0.0.1
  • IP Version: IPv4
  • Bridge Network Interface: bridge0
  • DNS 1: 10.0.0.1 
  • Domain: example.com
  • ZPool Volume: tank
  • Database: MariaDB
  • Database Version: 10.2.17
  • Setup iocage Jail


Install MariaDB


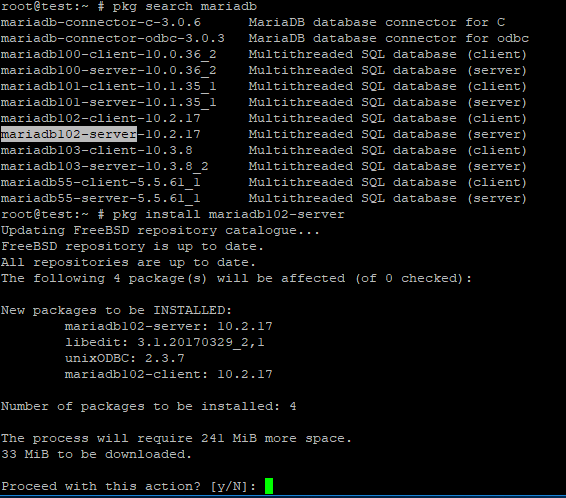
root@test:~ # pkg install mariadb102-server


MariaDB Configuration


Choose the configuration file from template for Database server eg: my-small.cnf, my-medium.cnf, my-large.cnf, or my-huge.cnf
root@test:~ # cp /usr/local/share/mysql/my-small.cnf /usr/local/etc/my.cnf 


Enable MariaDB Server to start on boot


root@test:~ # sysrc mysql_enable="yes"


Start MariaDB Server


root@test:~ # service mysql-server start


Configure and Secure MariaDB Server for production


root@test:~ # mysql_secure_installation

   Enter current password for root (enter for none): [Press Enter]
   Set root password? [Y/n]: y
   Remove anonymous users? [Y/n]: y
   Disallow root login remotely? [Y/n]: y
   Remove test database and access to it? [Y/n]: y
   Reload privilege tables now? [Y/n]: y


Test Login of 'root' user


root@test:~ # mysql -u root -p


Test SQL Queries


MariaDB [(none)]> select user,host,password from mysql.user;
MariaDB [(none)]> show databases; 
MariaDB [(none)]> exit;


Helpful Commands


Search for package
root@test:~ # pkg search mariadb


Resource Links


Friday, 28 October 2016

How to install a secure Wordpress CMS in a FreeNAS Jail

بسم الله الرحمن الرحيم


Abstract 


A tutorial to install a secure Wordpress CMS on a FreeNAS 9.10.1 Jail.


Assumptions and Prerequisites


  • Domain: example.com
  • Hostname: www.example.com
  • OS: FreeNAS 9.10.1-U2 (FreeBSD 10.3-STABLE)
  • Container: Warden Jail
  • Jail Name: www
  • Private IP: 10.0.0.56
  • Subnet Mask: 255.255.255.0/24
  • Database Server Name: db.example.com
  • Database Type and Version: MariaDB v10.1.18
  • Database Server IP: 10.0.0.57
  • Database Username: n7if835 (random generated)
  • Database Password: TunTeR3MPzqHy1KD (should be randomly generated)
  • Database Name: n7if835 (random generated)
  • Database Table Prefix: 24686nj9po7_ (should be randomly generated)
  • Database Server has SSL configured and enabled.
  • Apache has already been installed.
  • php56 and the necessary extensions are already installed.
  • Apache Webroot directory: /usr/local/www/apache24/data/
  • Apache 'AllowOverride' set to 'All'
  • Wordpress Version: 4.6.1


Instructions


Environment Setup

- Create a database 'n7if835' with username 'n7if835' with all privileges (Data, Structure, and Administration) and password 'TunTeR3MPzqHy1KD'

- Enable mod_rewrite module in apache by editing the file /usr/local/etc/apache24/httpd.conf
# vi /usr/local/etc/apache24/httpd.conf
   (177)   LoadModule rewrite_module libexec/apache24/mod_rewrite.so

- Install package wget to download wordpress archive
# pkg install wget

Install and Configure Wordpress

- Download wordpress from http://wordpress.org/latest.tar.gz
# cd /tmp
# wget http://wordpress.org/latest.tar.gz
- Unzip archive /tmp/latest.tar.gz
# tar xvf latest.tar.gz

- Copy /tmp/wordpress/ contents to webroot directory /usr/local/www/apache24/data/
# cp -Rfv /tmp/wordpress/* /usr/local/www/apache24/data/

- Goto https://www.example.com/ via web browser and follow the installation instructions.

- Enter the following Database details:
        Database Name: n7if835
        Username: n7if835
        Password: TunTeR3MPzqHy1KD
        Database Host: db.example.com
        Table Prefix: 24686nj9po7_

- Copy the generated code by wordpress installer into the file /usr/local/www/apache24/data/wp-config.php
# vi /usr/local/www/apache24/data/wp-config.php

- Click on the 'Run the Install' button and that will create the necessary database tables.

- Enter the following Site details:
        Site Title: www.exampl.com
        Username: webmin2001 (for security reasons don't use anything like 'admin')
        Password: (Enter strong password)
        Your Email: (your email address for this wordpress admin account)

- Enable Direct File System access by wordpress
# chmod -Rv 775 /usr/local/www/apache24/data/wp-content
- Edit file /usr/local/www/apache24/data/wp-config.php
# vi /usr/local/www/apache24/data/wp-config.php
   (40)    /** If you don't want to use FTP to add/delete/update plugins/themes then define this option. **/
   (41)    define('FS_METHOD','direct');

- Test by deleting and adding a plugin or theme.

Securing Wordpress

- Enable DB SSL Connection by Wordpress
Edit File /usr/local/www/apache24/data/wp-config.php
# vi /usr/local/www/apache24/data/wp-config.php
   (43)    /** Force Wordpress to use SSL connection to Database **/
   (44)    define('MYSQL_CLIENT_FLAGS', MYSQL_CLIENT_SSL);

- Goto https://www.example.com/phpmyadmin via web browser and change the following details:
           Username: n7if835 SSL setting from 'REQUIRE NONE' to 'REQUIRE SSL'.
           Remove Administration Privileges for user n7if835

- Disable file editing for editing plugins and themes.
Edit file /usr/local/www/apache24/data/wp-config.php
# vi /usr/local/www/apache24/data/wp-config.php
   (46)    /** Disable File Editing **/
   (47)    define('DISALLOW_FILE_EDIT', true);

- Force SSL Logins and SSL Admin Access
# vi /usr/local/www/apache24/data/wp-config.php
   (49)    /** Force SSL Logins **/
   (50)    define('FORCE_SSL_LOGIN', true);
   (51)
   (52)    /** Force SSL Admin Access **/
   (53)    define('FORCE_SSL_ADMIN', true);

- Delete files 'license.txt' and 'readme.html' in the wordpress root directory and also 'install.php' in wp-admin directory because they are possible site security holes.
# rm -v /usr/local/www/apache24/data/license.txt 
# rm -v /usr/local/www/apache24/data/readme.html
# rm -v /usr/local/www/apache24/data/wp-admin/install.php

- Make the file /usr/local/www/apache24/data/wp-config.php only readable by user and group
# chmod 440 /usr/local/www/apache24/data/wp-config.php

- Move the file /usr/local/www/apache24/data/wp-config.php up one directory to prevent web users access.
# mv /usr/local/www/apache24/data/wp-config.php /usr/local/www/apache24/wp-config.php

- Disable php functions that are not needed (good practice if website is on a shared host).
# vi /usr/local/etc/php.ini
    (303)  disable_functions = exec,passthru,shell_exec,system,proc_open,popen,curl_exec,curl_multi_exec,parse_ini_file,show_source

- Turn off expose_php in php.ini
# vi /usr/local/etc/php.ini
    (363)  expose_php = Off

- Disable opening urls as files
# vi /usr/local/etc/php.ini
    (831)  allow_url_fopen = Off

- Create .htaccess file in the wordpress root directory and write the following to prevent web directory browsing, user enumeration, includes directory access, hotlinking of images, and users from reading the wp-config file.
# vi /usr/local/www/apache24/data/.htaccess
    (1)    Options -Indexes +FollowSymLinks
    (2)  
    (3)    <IfModule mod_rewrite.c>
    (4)    RewriteEngine On
    (5)    RewriteBase /
    (6)
    (7)    # Enable Permalinks to work
    (8)    RewriteRule ^index\.php$ - [L]
    (9)    RewriteCond %{REQUEST_FILENAME} !-f
    (10)   RewriteCond %{REQUEST_FILENAME} !-d
    (11)   RewriteRule . /index.php [L]
    (12)
    (14)   # Prevent user enumeration
    (15)   RewriteCond %{QUERY_STRING} ^author=([0-9]*)
    (16)   RewriteRule .* https://www.example.com/? [L,R=302]
    (17)   RewriteRule ^wp-admin/includes/ - [F,L]
    (18)
    (19)   # Prevent includes directory access
    (20)   RewriteRule !^wp-includes/ - [S=3]
    (21)   RewriteRule ^wp-includes/[^/]+\.php$ - [F,L]
    (22)   RewriteRule ^wp-includes/js/tinymce/langs/.+\.php - [F,L]
    (23)   RewriteRule ^wp-includes/theme-compat/ - [F,L]
    (24)
    (25)   # Disable hotlinking of images with forbidden or custom image option
    (26)   RewriteCond %{HTTP_REFERER} !^$
    (27)   RewriteCond %{HTTP_REFERER} !^http(s)?://(www\.)?example.com [NC]
    (28)   RewriteCond %{HTTP_REFERER} !^http(s)?://(www\.)?google.com [NC]
    (29)   RewriteCond %{HTTP_REFERER} !^http(s)?://(www\.)?feeds2.feedburner.com/example [NC]
    (30)   RewriteRule \.(jpg|jpeg|png|gif)$ – [NC,F,L]
    (31)
    (32)   # Disable XMLRPC
    (33)   RewriteRule ^xmlrpc.php$ "http://0.0.0.0/" [R=301,L]
    (34)
    (35)   # Restrict access to plugins and themes php files from unauthorised users
    (36)   RewriteCond %{REQUEST_URI} !^/wp-content/plugins/file/to/exclude\.php
    (37)   RewriteCond %{REQUEST_URI} !^/wp-content/plugins/directory/to/exclude/
    (38)   RewriteRule wp-content/plugins/(.*\.php)$ - [R=404,L]
    (39)   RewriteCond %{REQUEST_URI} !^/wp-content/themes/file/to/exclude\.php
    (40)   RewriteCond %{REQUEST_URI} !^/wp-content/themes/directory/to/exclude/
    (41)   RewriteRule wp-content/themes/(.*\.php)$ - [R=404,L]
    (42)
    (43)   # Prevent Script injections
    (44)   RewriteCond %{QUERY_STRING} (<|%3C).*script.*(>|%3E) [NC,OR]
    (45)   RewriteCond %{QUERY_STRING} GLOBALS(=|[|%[0-9A-Z]{0,2}) [OR]
    (46)   RewriteCond %{QUERY_STRING} _REQUEST(=|[|%[0-9A-Z]{0,2})
    (47)   RewriteRule ^(.*)$ index.php [F,L]
    (48)   </IfModule>
    (49)
    (50)   # Protect wp-config.php from user access
    (51)   <files wp-config.php>
    (52)   Require all denied
    (53)   </files>

- Prevent execution of php scripts in the uploads directory
# vi /usr/local/www/apache24/data/wp-content/uploads/.htaccess
    (1)    # Disable php file execution
    (2)    <files *.php>
    (3)    Require all denied
    (4)    </files>

Thursday, 27 October 2016

How to install phpMyAdmin on a FreeNAS Jail

بسم الله الرحمن الرحيم


Abstract


A tutorial to install phpMyAdmin on a FreeNAS Jail. 

Assumptions and Prerequisites


  • Domain: example.com
  • Hostname: www.example.com
  • OS: FreeNAS 9.10.1-U2 (FreeBSD 10.3-STABLE)
  • Container: Warden Jail
  • Jail Name: www
  • Private IP: 10.0.0.56
  • Subnet Mask: 255.255.255.0/24
  • Apache has already been installed.
  • php56 is already installed.
  • Restrict Access only to local LAN (10.0.0.0/24).

Instructions


- First install php extensions required for phpMyAdmin.    
# pkg install php56-session php56-json php56-mbstring php56-zip php56-gd php56-openssl php56-curl php56-ctype php56-bz2 php56-mcrypt php56-zlib

- Install and Configure phpMyAdmin for Database Web Administration
# pkg install phpmyadmin
- Create phpMyAdmin configuration file /usr/local/etc/apache24/Includes/phpmyadmin.conf
# vi /usr/local/etc/apache24/Includes/phpmyadmin.conf
   (1)      Alias /phpmyadmin "/usr/local/www/phpMyAdmin/"
   (2)       
   (3)      <Directory "/usr/local/www/phpMyAdmin/">                  
   (4)          Options None
   (5)          AllowOverride Limit
   (6)
   (7)          Require local
   (8)          Require ip 10.0.0.0/24
   (9)      </Directory>

- Reload Apache Configurations
# service apache24 graceful

- Configure phpMyAdmin to connect with Database
Goto http://10.0.0.56/phpmyadmin/setup via web browser.
Click the button 'New server' and add a new server settings.
After configuring settings for the database server connection, click the 'Display' button.

- Copy the php code generated into the file /usr/local/www/phpMyAdmin/config.inc.php
# vi /usr/local/www/phpMyAdmin/config.inc.php

- Goto http://10.0.0.56/phpmyadmin via web browser and Login to phpmyadmin with your database username and password.

How to install MariaDB Server in a FreeNAS Jail

بسم الله الرحمن الرحيم


Description


A tutorial to install MariaDB Server v10.1.18 on a FreeNAS 9.10.1 Jail.


Assumptions and Prerequisites 


  • Domain: example.com
  • Hostname: db.example.com
  • OS: FreeNAS 9.10.1-U2 (FreeBSD 10.3-STABLE)
  • Container: Warden Jail
  • Jail Name: db
  • Private IP: 10.0.0.57
  • Subnet Mask: 255.255.255.0/24
  • Database Version: MariaDB v10.1.18
  • Database Server Type: Medium
  • SSL Certificates have been generated 
  • CA Certificate File: /usr/local/etc/ssl/certs/ca.pem
  • SSL Certificate File: /usr/local/etc/ssl/certs/db.example.com.crt
  • SSL Key File: /usr/local/etc/ssl/private/db.example.com.key


Instructions


Install MariaDB
# pkg install mariadb101-server

Configure Settings
Choose Configuration file for Database server: my-small.cnf, my-medium.cnf, my-large.cnf, or my-huge.cnf
# cp /usr/local/share/mysql/my-medium.cnf /usr/local/etc/my.cnf 

Enable MariaDB Server to run and start on boot
# sysrc mysql_enable=yes

Start MariaDB Server
# service mysql-server start

Configure secure setup for production
# mysql_secure_installation
   Set root password? [Y/n]: y
   Remove anonymous users? [Y/n]: y
   Disallow root login remotely? [Y/n]: y
   Remove test database and access to it? [Y/n]: y
   Reload privilege tables now? [Y/n]: y

Test root Login
# mysql -u root -p

Test sql queries
# select user,host,password from mysql.user;
# show databases; 
# exit;

Enable SSL on MariaDB Server
# vi /usr/local/etc/my.cnf
   (27)  # The MariaDB server
   (28)  [mysqld]
   (29)  ssl-ca=/usr/local/etc/ssl/certs/ca.pem
   (30)  ssl-cert=/usr/local/etc/ssl/certs/db.example.com.crt
   (31)  ssl-key=/usr/local/etc/ssl/private/db.example.com.key 
   (32)  bind-address    = 10.0.0.57 
   (33)  port = 3306