Thursday 25 October 2018

How to Setup phpMyAdmin in an iocage Jail on FreeNAS 11.1

بسم الله الرحمن الرحيم


Abstract


Tutorial on how to setup phpMyAdmin in an iocage Jail on FreeNAS 11.1.


Assumptions and Prerequisites


  • OS: FreeNAS 11.1-U6
  • FreeNAS Host: fn
  • FreeNAS Network Interface: igb0
  • FreeNAS IP: 10.0.0.2
  • FreeNAS Subnet Mask: 24
  • Jail Container: iocage
  • iocage Version: 1.0 Alpha
  • Jail Release: 11.1-RELEASE
  • Jail Name: test
  • Jail Network Interface: vnet0
  • Jail Network Config: DHCP
  • Jail Default Route: 10.0.0.1
  • IP Version: IPv4
  • Bridge Network Interface: bridge0
  • DNS 1: 10.0.0.1 
  • Domain: example.com
  • ZPool Volume: tank
  • Database: MariaDB v10.2.17
  • Web Server: NGINX v1.14.0_12
  • Web Directory: /usr/local/www/html
  • PHP Version: 7.2
  • phpMyAdmin Version: 4.8.3
  • Setup iocage Jail
  • Setup NGINX Web Server
  • Setup MariaDB 


Install phpMyAdmin


Since we are using php72 on the nginx webserver, we will install phpMyAdmin for the php72 version
root@test:~ # pkg install phpMyAdmin-php72


Create a Symbolic Link to the phpMyAdmin directory into the webroot directory
root@test:~ # ln -s /usr/local/www/phpMyAdmin /usr/local/www/html/phpmyadmin

Restart nginx and php-fpm service
root@test:~ # service nginx restart; service php-fpm restart


Configure phpMyAdmin 


Edit the /usr/local/www/phpMyAdmin/config.inc.php file and configure phpMyAdmin settings or delete the /usr/local/www/phpMyAdmin/config.inc.php and then go to http://test/phpmyadmin/setup to configure a database server host. For our example, I am going to use the phpMyAdmin setup wizard.

First delete /usr/local/www/phpMyAdmin/config.inc.php file
root@test:~ # rm -v /usr/local/www/phpMyAdmin/config.inc.php


Go to http://test/phpmyadmin/setup and configure a database server host


Copy the text of the generated configuration file and then paste it into the /usr/local/www/phpMyAdmin/config.inc.php file


Paste the config text into /usr/local/www/phpMyAdmin/config.inc.php and Save File
root@test:~ # ee /usr/local/www/phpMyAdmin/config.inc.php


Login to phpMyAdmin


Go to http://test/phpmyadmin in your browser and login using your root username and password.


Resource Links

Wednesday 24 October 2018

How to Setup a MariaDB Server v10.2 in an iocage Jail on FreeNAS 11.1

بسم الله الرحمن الرحيم


Abstract


Tutorial on how to setup MariaDB Database Server v10.2.17 in an iocage Jail on FreeNAS 11.1.


Assumptions and Prerequisites


  • OS: FreeNAS 11.1-U6
  • FreeNAS Host: fn
  • FreeNAS Network Interface: igb0
  • FreeNAS IP: 10.0.0.2
  • FreeNAS Subnet Mask: 24
  • Jail Container: iocage
  • iocage Version: 1.0 Alpha
  • Jail Release: 11.1-RELEASE
  • Jail Name: test
  • Jail Network Interface: vnet0
  • Jail Network Config: DHCP
  • Jail Default Route: 10.0.0.1
  • IP Version: IPv4
  • Bridge Network Interface: bridge0
  • DNS 1: 10.0.0.1 
  • Domain: example.com
  • ZPool Volume: tank
  • Database: MariaDB
  • Database Version: 10.2.17
  • Setup iocage Jail


Install MariaDB


root@test:~ # pkg install mariadb102-server


MariaDB Configuration


Choose the configuration file from template for Database server eg: my-small.cnf, my-medium.cnf, my-large.cnf, or my-huge.cnf
root@test:~ # cp /usr/local/share/mysql/my-small.cnf /usr/local/etc/my.cnf 


Enable MariaDB Server to start on boot


root@test:~ # sysrc mysql_enable="yes"


Start MariaDB Server


root@test:~ # service mysql-server start


Configure and Secure MariaDB Server for production


root@test:~ # mysql_secure_installation

   Enter current password for root (enter for none): [Press Enter]
   Set root password? [Y/n]: y
   Remove anonymous users? [Y/n]: y
   Disallow root login remotely? [Y/n]: y
   Remove test database and access to it? [Y/n]: y
   Reload privilege tables now? [Y/n]: y


Test Login of 'root' user


root@test:~ # mysql -u root -p


Test SQL Queries


MariaDB [(none)]> select user,host,password from mysql.user;
MariaDB [(none)]> show databases; 
MariaDB [(none)]> exit;


Helpful Commands


Search for package
root@test:~ # pkg search mariadb


Resource Links


How to Setup NGINX Web Server in an iocage Jail on FreeNAS 11.1

بسم الله الرحمن الرحيم


Abstract


Tutorial on how to setup NGINX Web Server with PHP72 in an iocage Jail on FreeNAS 11.1.


Assumptions and Prerequisites


  • OS: FreeNAS 11.1-U6
  • FreeNAS Host: fn
  • FreeNAS Network Interface: igb0
  • FreeNAS IP: 10.0.0.2
  • FreeNAS Subnet Mask: 24
  • Jail Container: iocage
  • iocage Version: 1.0 Alpha
  • Jail Release: 11.1-RELEASE
  • Jail Name: test
  • Jail Network Interface: vnet0
  • Jail Network Config: DHCP
  • Jail Default Route: 10.0.0.1
  • IP Version: IPv4
  • Bridge Network Interface: bridge0
  • DNS 1: 10.0.0.1 
  • Domain: example.com
  • ZPool Volume: tank
  • NGINX Version: 1.14.0_12
  • Web Directory: /usr/local/www/html
  • PHP Version: 7.2
  • Certificate File Name and Location: /usl/local/etc/ssl/test.crt
  • Certificate Key File Name and Location: /usr/local/etc/ssl/test.key
  • Setup iocage Jail

NGINX


Install NGINX
root@test:~ # pkg install nginx

Install Output


Enable NGINX to start on boot
root@test:~ # sysrc nginx_enable="yes"

Start NGINX Server
root@test:~ # service nginx start

Check to see what ports NGINX is listening on
root@test:~ # sockstat -4 -6 | grep nginx


NGINX Running Success


NGINX Loads Default Page


PHP72


Install PHP72
root@test:~ # pkg install php72 php72-extensions

Create Web Directory
root@test:~ # mkdir -p /usr/local/www/html

Edit NGINX main configuration file to set php as server side script
root@test:~ # ee /usr/local/etc/nginx/nginx.conf

. . . . . . . . . . . . 
02: user www;
. . . . . . . . . . . . 
42: server_name  test;
. . . . . . . . . . . .
49: root   /usr/local/www/html;
50: index  index.php index.html index.htm;
. . . . . . . . . . . . 
70: location ~ \.php$ { 
71:     root                  /usr/local/www/html;                                                                             
72:     fastcgi_pass    127.0.0.1:9000;                                                                                 
73:     fastcgi_index  index.php;                                                                                      
74:     fastcgi_param SCRIPT_FILENAME $request_filename;
75:     include            fastcgi_params;                                                                                 
76: } 
. . . . . . . . . . . .


Create php.ini file from copying the php production file template
root@test:~ # cp /usr/local/etc/php.ini-production /usr/local/etc/php.ini

Configure php.ini
root@test:~ # ee /usr/local/etc/php.ini

672: post_max_size = 10M
776: cgi.fix_pathinfo=0
825: upload_max_filesize = 10M
939: date.timezone = "Australia/Melbourne"

Enable PHP-FPM to start on boot
root@test:~ # sysrc php_fpm_enable="yes"

Start the PHP-FPM Service
root@test:~ # service php-fpm start

Check to see what ports PHP-FPM is listening on
root@test:~ # sockstat -4 -6| grep php-fpm

PHP-FPM Running Success 


Create a php file to check if php works
root@test:~ # echo "<?php phpinfo(); ?>" | tee /usr/local/www/html/phpinfo.php

Restart NGINX
root@test:~ # service nginx restart

Go to http://test/phpinfo.php to check if php script works. 


PHP Page Load Success


Setup HTTPS / SSL / TLS Service


In order to enable the HTTPS service on NGINX, we would need a SSL Certificate and Key. There are more than one way to acquire these certificate and key.

  1. Self-Signed Certificate and Key
  2. Webhosting Provider
  3. Let's Encrypt / Certbot / Acme

Once you have acquired the certificate files, then copy them in the following directory.

Certificate File Name and Location: '/usl/local/etc/ssl/test.crt'
Key File Name and Location: '/usr/local/etc/ssl/test.key'

Certificate and Key File Location


Edit '/usr/local/etc/nginx/nginx.conf' file to define the location of those certificates.
root@test:~ # ee /usr/local/etc/nginx/nginx.conf

. . . . . . . . . . .
 22:  http {
. . . . . . . . . . .
 40:     server {
. . . . . . . . . . .
 84:     } # End of http server block
. . . . . . . . . . .
123:    # HTTPS Server
124:    server {
125:       listen       443 ssl;
126:       server_name  test;
127:
128:        ssl_certificate      /usr/local/etc/ssl/test.crt;
129:        ssl_certificate_key  /usr/local/etc/ssl/test.key;
130
131:        ssl_session_cache    shared:SSL:1m;
132:        ssl_session_timeout  5m;
133:
134:        ssl_ciphers  HIGH:!aNULL:!MD5;
135:        ssl_prefer_server_ciphers  on;
136:
137:        root   /usr/local/www/html;
138:
139:        location / {
140:            index  index.php index.html index.htm;
141:        }
142:
143:        location ~ \.php$ {
144:            fastcgi_param HTTPS on;
145:            fastcgi_pass   127.0.0.1:9000;
146:            fastcgi_index  index.php;
147:            fastcgi_param  SCRIPT_FILENAME $request_filename;
148:            include        fastcgi_params;
149:        }
150:    } # End of https server block
. . . . . . . . . . .
153:} # End of http block


HTTPS Server Block


Restart NGINX and PHP-FPM Service
root@test:~ # service nginx restart ; service php-fpm restart

Go to https://test/phpinfo.php to check if the certificate work.


Certificate works


Observations


When using Self-Signed Certificates, make sure your Internet browser recognises the Certificate Authority that issued the certificate and key.


Helpful Commands


Check NGINX configuration settings and syntax
root@test:~# nginx -t


Resource Links


How to Setup Emby Media Server in an iocage Jail on FreeNAS 11.1

بسم الله الرحمن الرحيم


Abstract


Tutorial on how to setup Emby Media Server in an iocage Jail on FreeNAS 11.1.


Assumptions and Prerequisites


  • OS: FreeNAS 11.1-U6
  • FreeNAS Host: fn
  • FreeNAS Network Interface: igb0
  • FreeNAS IP: 10.0.0.2
  • FreeNAS Subnet Mask: 24
  • Jail Container: iocage
  • iocage Version: 1.0 Alpha
  • Jail Release: 11.1-RELEASE
  • Jail Name: emby
  • Jail Network Interface: vnet0
  • Jail Network Config: DHCP
  • Jail Default Route: 10.0.0.1
  • IP Version: IPv4
  • Bridge Network Interface: bridge0
  • DNS 1: 10.0.0.1 
  • Domain: example.com
  • ZPool Volume: tank
  • Dataset: /mnt/tank/movies
  • Emby Server Version: 3.5.3.0
  • Setup iocage Jail


Create a Dataset on FreeNAS and Set Permissions


Create dataset 'movies' on FreeNAS as windows type


Set dataset 'movies' user owner as 'mujahid(uid:1000)' and group owner as 'media(gid:8675309)'. And set these permissions recursively.


Mount Dataset in Emby Jail with Read/Write Permissions


root@fn:~ #  iocage fstab -a emby /mnt/tank/movies /mnt/movies nullfs rw 0 0


Installation 


Login/Console into Emby Jail


root@fn:~ # iocage console emby


Go to https://emby.media/freebsd-server.html to look up the instructions and release version on how to install the latest emby package.

Install Dependency packages for Emby Server


root@emby:~ # pkg install mono libass fontconfig freetype2 fribidi gnutls iconv opus samba48 sqlite3 libtheora libva libvorbis webp libx264 libzvbi


Install Emby Server 


root@emby:~ # pkg add -f https://github.com/MediaBrowser/Emby.Releases/releases/download/3.5.3.0/emby-server-freebsd_3.5.3.0_amd64.txz


Create group 'media' with gid:8675309 in the emby jail. Make sure the gid is the same as the gid on the FreeNAS host for the 'media' group. Then add the 'emby' user to the 'media' group on the emby jail as a member. This will make sure emby has group read/write permissions to the 'movies' dataset on the FreeNAS. Note: The group 'media' on the FreeNAS and the emby jail should have the same gid(8675309), otherwise the permissions won't work properly.

Create group 'media' with gid:8675309 
root@emby:~ # pw groupadd -n media -g 8675309

Add user 'emby' to group 'media'
root@emby:~ # pw groupmod media -m emby

Enable Emby to run at boot


root@emby:~ # sysrc emby_server_enable="YES"


Start Emby Service


root@emby:~ # service emby-server start


Run Emby Server Setup Wizard


Open your web browser and visit http://[IP ADDRESS]:8096 to run the Emby Server setup wizard.


Resource Links

Tuesday 23 October 2018

How to Setup an OpenVPN Client with IPFW in an iocage Jail on FreeNAS 11.1

بسم الله الرحمن الرحيم


Abstract


Tutorial on how to setup and configure an OpenVPN Client in an Transmission iocage jail on FreeNAS 11.1 with IPFW to implement a VPN Killswitch.


Assumptions and Prerequisites


  • OS: FreeNAS 11.1-U6
  • FreeNAS Host: fn
  • FreeNAS Network Interface: igb0
  • FreeNAS IP: 10.0.0.2
  • FreeNAS Subnet Mask: 24
  • Jail Container: iocage
  • iocage Version: 1.0 Alpha
  • Jail Release: 11.1-RELEASE
  • Jail Name: transmission
  • Jail Network Interface: vnet0
  • Jail Network Config: DHCP
  • Jail Default Route: 10.0.0.1
  • IP Version: IPv4
  • Bridge Network Interface: bridge0
  • DNS 1: 10.0.0.1 
  • Domain: example.com
  • ZPool Volume: tank
  • VPN Service Provider: Trust Zone VPN (https://trust.zone)
  • Setup iocage Jail
  • Firewall: IPFW


OpenVPN Pre-Setup Tasks


Allow Jail To Create TUN Network Devices


OpenVPN Client needs to create a TUN interface in order to establish a secure encrypted connection. According to the default iocage jail security settings (rule 4), it doesn't allow the jail to create a tun network interface device. Because of that, the OpenVPN client won't be able to create and establish a VPN Tunnel to your choice of a VPN Service Provider. So, in order for it to be able to do that, you would need to allow the devfs rule 4 to be able to create a tun device network interface for the OpenVPN. And the way to do that is to create a 'preinit' task on the FreeNAS to run the following command on reboot on the FreeNAS server.   
devfs rule -s 4 add path 'tun*' unhide


Reboot FreeNAS.

Download OpenVPN files from your VPN Provider


Download the necessary files from your VPN service provider. I downloaded and copied the *.ovpn and userpass.txt files from my vpn provider (trust.zone) to the (/usr/local/etc/openvpn/) directory, create the directory if it does not exist. Make sure all the certificates, keys and settings are listed in the (trust_zone_vpn.ovpn) file and the 'auth-user-pass' setting in the trust_zone_vpn.ovpn is set to point at 'userpass.txt'.The  'userpass.txt' file has your VPN account's  username and password listed in it. You will need this for OpenVPN to auto login when the jail start/restart.  
root@transmission:~ # mkdir -p /usr/local/etc/openvpn

Setup OpenVPN Client


Install the openvpn package
root@transmission:~ # pkg install openvpn

Set the location of the openvpn config file
root@transmission:~ # sysrc openvpn_configfile="/usr/local/etc/openvpn/openvpn.conf"

Enable OpenVPN to start on boot
root@transmission:~ # sysrc openvpn_enable="YES"

Create a symbolic link 'openvpn.conf' to your trustzone.ovpn settings file 
root@transmission:~ # ln -s /usr/local/etc/openvpn/trust_zone_vpn.ovpn /usr/local/etc/openvpn/openvpn.conf

Before starting the openvpn service, first check and note down your public IP. 
root@transmission:~ # host myip.opendns.com resolver1.opendns.com

Start the openvpn service
root@transmission:~ # service openvpn start

Wait a minute for the openvpn service to start and establish a connection. Check to see if the TUN device has been assigned a different IP. 
root@transmission:~ # ifconfig

Then check the public IP again. It should be different to the public IP you checked earlier before you started the openvpn service. 
root@transmission:~ # host myip.opendns.com resolver1.opendns.com 

If the vpn tunnel is not created or established or the public IP remains the same as before, then something went wrong. Check the messages log file. Look for the line where it says "openvpn[####]: Initialization Sequence Completed". The line "openvpn[####]: Initialization Sequence Completed" indicates the connection was successful and established.

root@transmission:~ # tail -f -n 30 /var/log/messages

Setup VPN Killswitch with IPFW


Create directory to hold the ipfw startup script(s)
root@transmission:~ # mkdir -p /usr/local/etc/ipfw

Create startup script for ipfw rules
root@transmission:~ # ee /usr/local/etc/ipfw/ipfw_rules

---------File "/usr/local/etc/ipfw/ipfw_rules"---------------
#!/bin/bash
# Flush out the list before we begin
ipfw -q -f flush

# Set rules command prefix
cmd="ipfw -q add"
vpn="tun0"

# allow all local traffic on the loopback interface
$cmd 00001 allow all from any to any via lo0

# allow any connection to/from VPN interface
$cmd 00010 allow all from any to any via $vpn

# allow connection to/from LAN by Transmission
$cmd 00101 allow all from me to 10.0.0.0/24 uid transmission
$cmd 00102 allow all from 10.0.0.0/24 to me uid transmission

# deny any Transmission connection outside LAN that does not use VPN
$cmd 00103 deny all from any to any uid transmission
--------------End of File-------------------------------------------

Enable IPFW to start on boot
root@transmission:~ # sysrc firewall_enable="YES"

Set the startup script for ipfw rules
root@transmission:~ # sysrc firewall_script="/usr/local/etc/ipfw/ipfw_rules"

Start the IPFW service
root@transmission:~ # service ipfw start

Note: Although, the listed IPFW rules above implements a VPN killswitch. But, the major disadvantage of these rules is that it also prevents the access to the web admin GUI interface of Transmission from the LAN for Torrent administration when VPN tunnel is active. If anyone can write better IPFW rules that would implement a VPN killswitch without losing access to the web interface of Transmission, then let me know.

On my personal setup, instead of placing the OpenVPN and the Firewall rules to implement a VPN killswitch within the Jail itself, I have placed the VPN client on my pfSense router and configured the firewall rules on the pfSense router for my Transmission jail accordingly. I will probably write up a tutorial on how to do that on a separate post.       

Helpful Commands


Check your Public IP


root@transmission:~ # host myip.opendns.com resolver1.opendns.com
    .....or.....
root@transmission:~ # curl https://wtfismyip.com/text
    .....or.....
root@transmission:~ # curl ifconfig.me

Create a Symbolic link


root@transmission:~ # ln -s /path/to/source/file /path/to/new/link/file

Watch/Monitor a log file in real-time up to 30 lines


root@transmission:~ # tail -f -n 30 /var/log/messages

Resource Links


Thursday 11 October 2018

How to Setup BitTorrent Client Transmission iocage Jail on FreeNAS 11.1

بسم الله الرحمن الرحيم


Abstract


Tutorial on how to setup and configure a Bit Torrent Transmission Client in an iocage jail on FreeNAS 11.1.

Assumptions and Prerequisites


  • OS: FreeNAS 11.1-U6
  • FreeNAS Host: fn
  • FreeNAS Network Interface: igb0
  • FreeNAS IP: 10.0.0.2
  • FreeNAS Subnet Mask: 24
  • Jail Container: iocage
  • iocage Version: 1.0 Alpha
  • Jail Release: 11.1-RELEASE
  • Jail Name: transmission
  • Jail Network Interface: vnet0
  • Jail Network Config: DHCP
  • Jail Default Route: 10.0.0.1
  • IP Version: IPv4
  • Bridge Network Interface: bridge0
  • DNS 1: 10.0.0.1 
  • Domain: example.com
  • ZPool Volume: tank
  • Dataset: /mnt/tank/torrents
  • Setup iocage Jail


Instructions


1. Create an iocage Jail with VNET configured by DHCP 


iocage create -n "[Name]" -r [Release] vnet="on" bpf="yes" dhcp="on" allow_raw_sockets="1" boot="on" interfaces="vnet[N]:bridge[N]" resolver="search [DOMAIN];domain [DOMAIN];nameserver [DNS1 IP]

root@fn:~ # iocage create -n "transmission" -r 11.1-RELEASE defaultrouter="10.0.0.1" vnet="on" bpf="yes" dhcp="on" allow_raw_sockets="1" boot="on" interfaces="vnet0:bridge0" host_hostname="transmission" resolver="search example.com;domain example.com;nameserver 10.0.0.1"

2. Create Dataset and then mount inside the Jail


Create a user (eg:mujahid) as member of the media (gid:8675309) group that will have group access to the 'torrents' dataset on FreeNAS.


Create a dataset 'torrents' on the FreeNAS volume as type 'Windows'.


Create a torrent watch directory(watch_dir) for transmission within the 'torrents' dataset. When any torrent file is copied into this directory, transmission will read the file and add to its queue for downloading. This is optional if you don't need to create a torrent watch directory.  
root@fn:~ # mkdir -p /mnt/tank/torrents/watch_dir

Create a torrent downloads directory(downloads) for transmission within the 'torrents' dataset. This is the directory transmission will use to save the downloaded files. 
root@fn:~ # mkdir -p /mnt/tank/torrents/downloads

Set dataset 'torrents' user owner as 'mujahid(uid:1000)' and group owner as 'media(gid:8675309)'. And set these permissions recursively.


Create a windows share for the 'torrents' dataset on FreeNAS, So the FreeNAS user 'mujahid' can access the 'downloads' directory contents.


Mount the dataset '/mnt/tank/torrents/downloads' on FreeNAS into "Transmission" jail with read/write access.
root@fn:~ #  iocage fstab -a transmission /mnt/tank/torrents/downloads /mnt/downloads nullfs rw 0 0

Mount dataset '/mnt/tank/torrents/watch_dir' on FreeNAS into transmission jail with read/write access.
root@fn:~ #  iocage fstab -a transmission /mnt/tank/torrents/watch_dir /mnt/watch_dir nullfs rw 0 0

3. Install and Configure Transmission client in iocage jail


Login/Console into the transmission jail
root@fn:~ # iocage console transmission

Install the transmission package
root@transmission:~ # pkg install transmission-daemon

Create group 'media' with gid:8675309 in the transmission jail. Make sure the gid is the same as the gid on the FreeNAS host for the 'media' group. Then add the 'transmission' user to the 'media' group on the transmission jail as a member. This will make sure transmission has group read/write permissions to the 'torrents' dataset on the FreeNAS. Note: The group 'media' on the FreeNAS and the transmission jail should have the same gid(8675309), otherwise the permissions won't work properly.

Create group 'media' with gid:8675309 
root@transmission:~ # pw groupadd -n media -g 8675309

Add user 'transmission' to group 'media'
root@transmission:~ # pw groupmod media -m transmission

Enable transmission to start on boot
root@transmission:~ # sysrc transmission_enable="YES"

Set the transmission auto file permissions and ownership check to 'No'. Because, when the transmission service starts, it resets the user and group ownership of the FreeNAS dataset 'torrents' to the default jail user and group "root:wheel", which we don't want because the user won't be able to access the downloads share directory contents.
root@transmission:~ # sysrc transmission_chown="NO"

Set the download directory for transmission
root@transmission:~ # sysrc transmission_download_dir="/mnt/downloads"

Set the torrents watch directory for transmission.
root@transmission:~ # sysrc transmission_download_dir="/mnt/watch_dir"

Start and then stop the transmission service to create a '/usr/local/etc/transmission/home/settings.json' file with default settings.
root@transmission:~ # service transmission start && service transmission stop

Edit the 'settings.json' file to change the transmission configurations with the following settings 
root@transmission:~ # ee /usr/local/etc/transmission/home/settings.json

{   
    "port-forwarding-enabled": false, 
               .......
    "rpc-whitelist": "127.0.0.1, 10.0.0.*",     # Only for internal network clients to access 
               ....... 
    "speed-limit-up-enabled": true,             
               .......
    "trash-original-torrent-files": false,         # Do not save torrent files
    "umask": 2,                                              # Make downloads directory group read writable
               .......
    "watch-dir": "/mnt/watch_dir",               # Watch directory for *.torrent files
    "watch-dir-enabled": true                        # Watch directory enabled
}

Start transmission service
root@transmission:~ # service transmission start

Go to http://[IP]:9091/transmission/web to check if the transmission web-gui is accessible.


Helpful Commands


Remove user from group
root@transmission:~ # pw groupmod media -d transmission

Show Group members
root@transmission:~ # pw groupshow media

watch/monitor a log file in real-time up to 30 lines
root@transmission:~ # tail -f -n 30/var/log/messages

Links and Resources

How to Create and Configure an iocage Jail on FreeNAS 11.1

بسم الله الرحمن الرحيم


Abstract


Tutorial on how to create and configure an iocage jail on FreeNAS 11.1.

Assumptions and Prerequisites


  • OS: FreeNAS 11.1-U6
  • FreeNAS Host: fn
  • FreeNAS Network Interface: igb0
  • FreeNAS IP: 10.0.0.2
  • FreeNAS Subnet Mask: 24
  • Jail Container: iocage
  • iocage Version: 1.0 Alpha
  • Jail Release: 11.1-RELEASE
  • Jail Name: test
  • Jail Network Interface: vnet0
  • Jail Network Config: DHCP | STATIC
  • Jail IP: 10.0.0.3
  • Jail Default Route: 10.0.0.1
  • IP Version: IPv4
  • Bridge Network Interface: bridge0
  • DNS 1: 10.0.0.1 
  • Domain: example.com
  • ZPool Volume: tank
  • Dataset: /mnt/tank/share

Instructions


List iocage Commands


root@fn:~ # iocage

Activate iocage zpool volume


Set iocage to use the default volume, use the following command.
root@fn:~ # iocage activate
    or
Set iocage to use a zpool volume if more than one exist on the FreeNAS
iocage activate [zpool]
root@fn:~ # iocage activate tank

Fetch/Download a Release Image


Fetch a release which will be used to create a jail.

Fetch a release from a list
root@fn:~ # iocage fetch

Fetch a release by name
iocage fetch -r [RELEASE IMAGE NAME]
root@fn:~ # iocage fetch -r 11.1-RELEASE


Create a Jail with VNET/VIMAGE (Virtual Network Interface Stack) and DHCP


Command Example:  iocage create -n "[Name]" -r [Release] vnet="on" bpf="yes" dhcp="on" allow_raw_sockets="1" boot="on" interfaces="vnet[N]:bridge[N]" resolver="search [DOMAIN];domain [DOMAIN];nameserver [DNS1 IP]

The following command creates a jail "test" from the "11.1-RELEASE" image with the following jail properties enabled, vnet/vimage network stack, Start on boot, and dhcp.

root@fn:~ # iocage create -n "test" -r 11.1-RELEASE vnet="on" bpf="yes" dhcp="on" allow_raw_sockets="1" boot="on" interfaces="vnet0:bridge0" resolver="search example.com;domain example.com;nameserver 10.0.0.1"


Create a Jail with VNET/VIMAGE (Virtual Network Interface Stack) and Static IP Configuration


Command Example: iocage create -n "[Name]" -r [Release] ip4_addr="vnet[N]|[IP]/[Mask]" defaultrouter="[IP]" vnet="on" allow_raw_sockets="1" boot="on" interfaces="vnet[N]:bridge[N]" resolver="search [DOMAIN];domain [DOMAIN];nameserver [DNS1 IP]"


root@fn:~ # iocage create -n "test" -r 11.1-RELEASE vnet="on" ip4_addr="vnet0|10.0.0.3/24" defaultrouter="10.0.0.1" vnet="on" allow_raw_sockets="1" boot="on" interfaces="vnet0:bridge0" resolver="search example.com;domain example.com;nameserver 10.0.0.1"


Create a Jail with a Shared IP


Command Example: iocage create -n "[Name]" -r [Release] ip4_addr="[IF]|[IP]/[MASK]" defaultrouter="[IP]" vnet="off" allow_raw_sockets="1" boot="on" resolver="search [DOMAIN];domain [DOMAIN];nameserver [DNS1 IP]"

root@fn:~ # iocage create -n "test" -r 11.1-RELEASE ip4_addr="igb0|10.0.0.100/24" defaultrouter="10.0.0.1" vnet="off" allow_raw_sockets="1" boot="on" resolver="search example.com;domain example.com;nameserver 10.0.0.1"

List Jails, Releases, and Plugins


List all Jails
root@fn:~ # iocage list

List all downloaded Releases
root@fn:~ # iocage list -r

List all available Templates
root@fn:~ # iocage list -t

List Remote Plugins
iocage list -PR
or
iocage list --plugins --remote

List Installed Plugins
iocage list -P
or
iocage list --plugins

Start, Stop, or Restart a Jail


Start a Jail
iocage start [JAIL NAME]
root@fn:~ # iocage start test

Stop a Jail
iocage stop [JAIL NAME]
root@fn:~ # iocage stop test

Restart a Jail
iocage restart [JAIL NAME]
root@fn:~ # iocage restart test

Configure a Jail


Set Jail Property
iocage set [PROPERTY]="[ARG]" [JAIL NAME]
root@fn:~ # iocage set notes="This is a test jail." test

Get Jail Property
iocage get [PROPERTY] [JAIL NAME]
root@fn:~ # iocage get notes test

Get All Properties of a Jail
iocage get all [JAIL NAME]
root@fn:~ # iocage get all test

Delete/Destroy a Jail


iocage destroy [JAIL NAME]
root@fn:~ # iocage destroy test

Rename a Jail


iocage rename [OLD JAIL NAME] [NEW JAIL NAME]
root@fn:~ # iocage rename test test2

Log in to a Jail


iocage console [JAIL NAME]
root@fn:~ # iocage console test

Run a command inside a Jail


iocage exec [JAIL NAME] "[COMMAND]"
root@fn:~ # iocage exec test "ls -lfa /etc"

Mount Dataset inside a Jail as Read Only


iocage fstab -a [JAIL NAME] /source/folder  /destination/folder/in/jail  nullfs  ro  0  0
root@fn:~ # iocage fstab -a test /mnt/tank/share /mnt/share nullfs ro  0  0

Mount Dataset inside a Jail as Read and Write


iocage fstab -a [JAIL NAME] /source/folder  /destination/folder/in/jail  nullfs  rw  0  0
root@fn:~ # iocage fstab -a test /mnt/tank/share /mnt/share nullfs rw  0  0

List Jail Mount Entries


iocage fstab -l [JAIL NAME]
root@fn:~ # iocage fstab -l test

Edit Jail Mount Entries


iocage fstab -e [JAIL NAME]
root@fn:~ # iocage fstab -e test

Remove a Jail Mount Entry


iocage fstab -r [JAIL NAME] [INDEX]
root@fn:~ # iocage fstab -r test 0

Create Jail Snapshot


iocage snapshot -n "[SNAPSHOT NAME]" [JAIL]
root@fn:~ # iocage snapshot -n "Recent Upgrade" test

List Jail Snapshots


iocage snaplist [JAIL]
root@fn:~ # iocage snaplist test

Remove/Delete Jail Snapshot


iocage snapremove -n "[SNAPSHOT NAME]" [JAIL]
root@fn:~ # iocage snapremove -n "Recent Upgrade" test

Rollback Jail to a Snapshot


iocage rollback -n "[SNAPSHOT NAME]" [JAIL]
root@fn:~ # iocage rollback -n "Recent Upgrade" test


Observations


DNS Resolver


When you create a Jail in iocage and skip to define the 'resolver' property, the iocage uses the host system's (in this case the FreeNAS host) default DNS settings defined in the '/etc/resolv.conf'.

If your FreeNAS has been configured as a Domain Controller, it resets the DNS setting in the '/etc/resolv.conf' to point to itself. Example: "nameserver 127.0.0.1". Incidentally, the iocage jail DNS is also set to 127.0.0.1. As a result, all the DNS queries within the jail fail because the jail points to itself as a nameserver where a name service does not exits. So, in order for the jail's DNS to work, we will need to manually define the resolver property for the jail.

And if you have a complicated network setup, like a switch with multiple VLANs. You will also need to define the 'defaultrouter' and 'interfaces' property so that the vnet interface is linked to the correct bridge interface and the bridge interface is link to the correct VLAN interface.


Helpful Commands


Check iocage version
root@fn:~ # iocage -v

iocage Help command
root@fn:~ # iocage --help

List all zpools on the FreeNAS
root@fn:~ # zpool list

Delete Release
iocage destroy -r [RELEASE NAME]
root@fn:~ # iocage destroy -r 11.0-RELEASE

Links and Resources


Friday 11 November 2016

How to Install and Setup Samba4 DC in a FreeNAS 9.10 Jail

بسم الله الرحمن الرحيم


Abstract 


  • A tutorial to install Samba 4.3 as an Active Directory Domain Controller in a FreeNAS 9.10 Jail.
  • Configure and enable SSL for Samba's LDAP backend.


Assumptions and Prerequisites


  • Domain: example.com
  • Hostname: dc.example.com
  • OS: FreeNAS 9.10.1-U2 (FreeBSD 10.3-STABLE)
  • Container: Warden Jail
  • Jail Name: dc
  • Private IP: 10.0.0.58
  • Subnet Mask: 255.255.255.0/24
  • Main Router IP: 10.0.0.1
  • DNS Forwarder IP: 10.0.0.1 (main router)
  • Service: Samba 4.3.11
  • DNS: Internal Samba DNS 
  • NTP Host IP: 10.0.0.1 (main router)
  • CA Certificate File: /usr/local/etc/ssl/certs/ca.pem
  • SSL Certificate File: /usr/local/etc/ssl/certs/dc.example.com.crt
  • SSL Key File: /usr/local/etc/ssl/private/dc.example.com.key


Instructions


Pre-installation setup

- Edit file /etc/rc.conf and change hostname to dc.example.com.
# vi /etc/rc.conf
  (7)    hostname="dc.example.com"

- Edit file /etc/hosts file and change the 10.0.0.58 -> dc.example.com dc
# vi /etc/hosts
  (14)   127.0.0.1               localhost localhost.localdomain dc
  (15)   10.0.0.58       dc.example.com dc

Installation 

- Install samba43. Don't install samba44 or a newer version of samba than 4.3 because the newer versions doesn't come with ntvfs option anymore. i.e no --use-ntvfs option for zfs.
# pkg install samba43

- Provision Samba as an Active Directory Domain Controller
# samba-tool domain provision --use-ntvfs --use-rfc2307 --interactive
Realm [EXAMPLE.COM]:  (press Enter)
 Domain [EXAMPLE]:  (press Enter)
 Server Role (dc, member, standalone) [dc]: (press Enter)
 DNS backend (SAMBA_INTERNAL, BIND9_FLATFILE, BIND9_DLZ, NONE) [SAMBA_INTERNAL]: (press Enter)
 DNS forwarder IP address (write 'none' to disable forwarding) [10.0.0.1]:  (press Enter)
Administrator password: (enter password)
Retype password: (re-enter password)

Query Result:    
Looking up IPv4 addresses 
Looking up IPv6 addresses  
No IPv6 address will be assigned 
Setting up share.ldb 
Setting up secrets.ldb  
Setting up the registry 
Setting up the privileges database 
Setting up idmap db  
Setting up SAM db      
Setting up sam.ldb partitions and settings
Setting up sam.ldb rootDSE
Pre-loading the Samba 4 and AD schema 
Adding DomainDN: DC=example,DC=com 
Adding configuration container  
Setting up sam.ldb schema  
Setting up sam.ldb configuration data
Setting up display specifiers
Modifying display specifiers 
Adding users container 
Modifying users container 
Adding computers container
Modifying computers container 
Setting up sam.ldb data  
Setting up well known security principals 
Setting up sam.ldb users and groups 
Setting up self join 
Adding DNS accounts 
Creating CN=MicrosoftDNS,CN=System,DC=example,DC=com
Creating DomainDnsZones and ForestDnsZones partitions 
Populating DomainDnsZones and ForestDnsZones partitions
Setting up sam.ldb rootDSE marking as synchronized 
Fixing provision GUIDs 
A Kerberos configuration suitable for Samba 4 has been generated at /var/db/samba4/private/krb5.conf
Setting up fake yp server settings
Once the above files are installed, your Samba4 server will be ready to use  
Server Role:           active directory domain controller   
Hostname:              dc
NetBIOS Domain:        EXAMPLE
DNS Domain:            example.com
DOMAIN SID:            S-1-5-21-458877043-2880298934-1173284452

- Edit the /etc/resolv.conf file for host dns to point to the samba DNS.
# vi /etc/resolv.conf
  (1)   search example.com
  (2)   domain example.com
  (3)   nameserver 127.0.0.1

- Create symbolic links for the kerberos keytab and config files in the /usr/local/etc directory.
# ln -s /var/db/samba4/private/krb5.conf /usr/local/etc/krb5.conf
# ln -s /var/db/samba4/private/dns.keytab /usr/local/etc/krb5.keytab

- Enable samba to run and also start at boot
# sysrc samba_server_enable="YES"

- Start samba server
# service samba_server start

Test Samba Server

- Verify LDAP Service DNS Record
# host -t SRV _ldap._tcp.example.com
Query Result: _ldap._tcp.example.com has SRV record 0 100 389 dc.example.com.

- Verify Kerberos Service DNS Record
# host -t SRV _kerberos._udp.example.com
Query Result: _kerberos._udp.example.com has SRV record 0 100 88 dc.example.com.

- Verify Domain Controller DNS Record
# host -t A dc.example.com
Query Result: dc.example.com has address 10.0.0.58

- Test Kerberos Authentication
# kinit administrator@EXAMPLE.COM
# klist
Query Result:
Credentials cache: FILE:/tmp/krb5cc_0 
        Principal: administrator@EXAMPLE.COM  
                      
  Issued                Expires               Principal 
Nov  6 21:16:46 2016  Nov  7 07:16:46 2016  krbtgt/EXAMPLE.COM@EXAMPLE.COM 

- Test Samba File Server
# smbclient -L localhost -U%
Query Result:
Domain=[EXAMPLE] OS=[Unix] Server=[Samba 4.3.11]   
                      
        Sharename       Type      Comment 
        ---------       ----      -------  
        netlogon        Disk                
        sysvol          Disk               
        IPC$            IPC       IPC Service 
Domain=[EXAMPLE] OS=[Unix] Server=[Samba 4.3.11]                                                                                     
        Server               Comment  
        ---------            -------   
                      
        Workgroup            Master  
        ---------            -------

- Test Samba User Logon
# smbclient //localhost/netlogon -Uadministrator
Query Result:
Enter administrator's password:   
Domain=[EXAMPLE] OS=[Unix] Server=[Samba 4.3.11] 
smb: \>    

- List Domain Users
# wbinfo -u | sort

- List Domain Groups
# wbinfo -g | sort  

Enable SSL for LDAP Backend

- Generate Self-Signed Certificate Authority, Server Certificate and Key.

- Edit file /usr/local/etc/smb4.conf to configure SSL certs
# vi /usr/local/etc/smb4.conf
  (13)   tls enabled  = yes
  (14)   tls cafile   = /usr/local/etc/ssl/certs/ca.pem
  (15)   tls certfile = /usr/local/etc/ssl/certs/dc.example.com.crt
  (16)   tls keyfile  = /usr/local/etc/ssl/private/dc.example.com.key

- Restart samba server
# service samba_server restart

Samba Administration

- Download and Install Remote Server Administration Tools (RSAT) for Administration for Windows

Sunday 30 October 2016

How to install and configure Certbot in a FreeNAS Jail

بسم الله الرحمن الرحيم


Abstract


  • A tutorial to install and configure certbot within a FreeNAS Jail.
  • Certbot is 'Electronic Frontier Foundation's ' implementation to issue free automated SSL certificates for webservers that are recognised by popular web browsers.  


Assumptions and Prerequisites


  • Domain: example.com
  • Hostname: www.example.com
  • OS: FreeNAS 9.10.1-U2 (FreeBSD 10.3-STABLE)
  • Container: Warden Jail
  • Jail Name: www
  • Private IP: 10.0.0.56
  • Subnet Mask: 255.255.255.0/24
  • Certbot Version: 0.9.3
  • Apache has already been installed.
  • Apache Version: 2.4.23
  • Apache Webroot directory: /usr/local/www/apache24/data
  • SSL Certificate File: /usr/local/etc/letsencrypt/live/www.example.com/fullchain.pem
  • SSL Key File: /usr/local/etc/letsencrypt/live/www.example.com/privkey.pem 
  • Apache is bound to port 80 and 443.
  • Port 80 and 443 forwarding is enabled on the router to allow access to Apache webserver from the Internet.
  • Email: info@example.com (required to recover lost account details from certbot).


Instructions


- Install certbot
# pkg install py27-certbot

- Configure domain
# certbot certonly
Follow installer instructions
    domain: www.example.com
    webroot: /usr/local/www/apache24/data
    email: info@example.com

- Test certs renewal
# certbot renew --dry-run 

- Renew certs (Renews certs on port 80 for 90 days. Will not renew cert if expiry date of cert is less than 30 days).
# certbot renew --quiet

-  Force cert renewal with current issue date
# certbot renew --quiet --force-renewal

- Renew cert with a higher rsa-key size 4096
# certbot renew --quiet --rsa-key-size 4096 

-  Force cert renewal on https port 443 with a higher rsa-key size 4096
# certbot renew --quiet --rsa-key-size 4096 --force-renewal --tls-sni-01-port 443

- Change SSL Cert file paths in Apache to point to the new location of certbot's certificates
# vi /usr/local/etc/apache24/extra/httpd-ssl.conf
   (144)  SSLCertificateFile "/usr/local/etc/letsencrypt/live/www.example.com/fullchain.pem"
   (154)  SSLCertificateKeyFile "/usr/local/etc/letsencrypt/live/www.example.com/privkey.pem"
   (175)  #SSLCACertificateFile "/usr/local/etc/ssl/certs/ca.pem"

- Reload Apache config after certs renewal
# apachectl -k graceful

- Setup a cron job in FreeNAS to auto renew certs and reload the new apache settings with the following command.
# jexec www certbot renew --quiet --rsa-key-size 4096 && jexec www apachectl -k graceful

- Test the new SSL certs at the SSLABS website. This should give you an A+ on the SSL report.

- Links


Friday 28 October 2016

How to install a secure Wordpress CMS in a FreeNAS Jail

بسم الله الرحمن الرحيم


Abstract 


A tutorial to install a secure Wordpress CMS on a FreeNAS 9.10.1 Jail.


Assumptions and Prerequisites


  • Domain: example.com
  • Hostname: www.example.com
  • OS: FreeNAS 9.10.1-U2 (FreeBSD 10.3-STABLE)
  • Container: Warden Jail
  • Jail Name: www
  • Private IP: 10.0.0.56
  • Subnet Mask: 255.255.255.0/24
  • Database Server Name: db.example.com
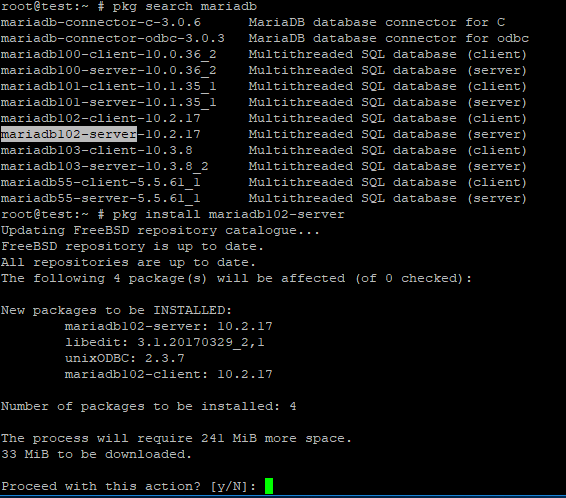
  • Database Type and Version: MariaDB v10.1.18
  • Database Server IP: 10.0.0.57
  • Database Username: n7if835 (random generated)
  • Database Password: TunTeR3MPzqHy1KD (should be randomly generated)
  • Database Name: n7if835 (random generated)
  • Database Table Prefix: 24686nj9po7_ (should be randomly generated)
  • Database Server has SSL configured and enabled.
  • Apache has already been installed.
  • php56 and the necessary extensions are already installed.
  • Apache Webroot directory: /usr/local/www/apache24/data/
  • Apache 'AllowOverride' set to 'All'
  • Wordpress Version: 4.6.1


Instructions


Environment Setup

- Create a database 'n7if835' with username 'n7if835' with all privileges (Data, Structure, and Administration) and password 'TunTeR3MPzqHy1KD'

- Enable mod_rewrite module in apache by editing the file /usr/local/etc/apache24/httpd.conf
# vi /usr/local/etc/apache24/httpd.conf
   (177)   LoadModule rewrite_module libexec/apache24/mod_rewrite.so

- Install package wget to download wordpress archive
# pkg install wget

Install and Configure Wordpress

- Download wordpress from http://wordpress.org/latest.tar.gz
# cd /tmp
# wget http://wordpress.org/latest.tar.gz
- Unzip archive /tmp/latest.tar.gz
# tar xvf latest.tar.gz

- Copy /tmp/wordpress/ contents to webroot directory /usr/local/www/apache24/data/
# cp -Rfv /tmp/wordpress/* /usr/local/www/apache24/data/

- Goto https://www.example.com/ via web browser and follow the installation instructions.

- Enter the following Database details:
        Database Name: n7if835
        Username: n7if835
        Password: TunTeR3MPzqHy1KD
        Database Host: db.example.com
        Table Prefix: 24686nj9po7_

- Copy the generated code by wordpress installer into the file /usr/local/www/apache24/data/wp-config.php
# vi /usr/local/www/apache24/data/wp-config.php

- Click on the 'Run the Install' button and that will create the necessary database tables.

- Enter the following Site details:
        Site Title: www.exampl.com
        Username: webmin2001 (for security reasons don't use anything like 'admin')
        Password: (Enter strong password)
        Your Email: (your email address for this wordpress admin account)

- Enable Direct File System access by wordpress
# chmod -Rv 775 /usr/local/www/apache24/data/wp-content
- Edit file /usr/local/www/apache24/data/wp-config.php
# vi /usr/local/www/apache24/data/wp-config.php
   (40)    /** If you don't want to use FTP to add/delete/update plugins/themes then define this option. **/
   (41)    define('FS_METHOD','direct');

- Test by deleting and adding a plugin or theme.

Securing Wordpress

- Enable DB SSL Connection by Wordpress
Edit File /usr/local/www/apache24/data/wp-config.php
# vi /usr/local/www/apache24/data/wp-config.php
   (43)    /** Force Wordpress to use SSL connection to Database **/
   (44)    define('MYSQL_CLIENT_FLAGS', MYSQL_CLIENT_SSL);

- Goto https://www.example.com/phpmyadmin via web browser and change the following details:
           Username: n7if835 SSL setting from 'REQUIRE NONE' to 'REQUIRE SSL'.
           Remove Administration Privileges for user n7if835

- Disable file editing for editing plugins and themes.
Edit file /usr/local/www/apache24/data/wp-config.php
# vi /usr/local/www/apache24/data/wp-config.php
   (46)    /** Disable File Editing **/
   (47)    define('DISALLOW_FILE_EDIT', true);

- Force SSL Logins and SSL Admin Access
# vi /usr/local/www/apache24/data/wp-config.php
   (49)    /** Force SSL Logins **/
   (50)    define('FORCE_SSL_LOGIN', true);
   (51)
   (52)    /** Force SSL Admin Access **/
   (53)    define('FORCE_SSL_ADMIN', true);

- Delete files 'license.txt' and 'readme.html' in the wordpress root directory and also 'install.php' in wp-admin directory because they are possible site security holes.
# rm -v /usr/local/www/apache24/data/license.txt 
# rm -v /usr/local/www/apache24/data/readme.html
# rm -v /usr/local/www/apache24/data/wp-admin/install.php

- Make the file /usr/local/www/apache24/data/wp-config.php only readable by user and group
# chmod 440 /usr/local/www/apache24/data/wp-config.php

- Move the file /usr/local/www/apache24/data/wp-config.php up one directory to prevent web users access.
# mv /usr/local/www/apache24/data/wp-config.php /usr/local/www/apache24/wp-config.php

- Disable php functions that are not needed (good practice if website is on a shared host).
# vi /usr/local/etc/php.ini
    (303)  disable_functions = exec,passthru,shell_exec,system,proc_open,popen,curl_exec,curl_multi_exec,parse_ini_file,show_source

- Turn off expose_php in php.ini
# vi /usr/local/etc/php.ini
    (363)  expose_php = Off

- Disable opening urls as files
# vi /usr/local/etc/php.ini
    (831)  allow_url_fopen = Off

- Create .htaccess file in the wordpress root directory and write the following to prevent web directory browsing, user enumeration, includes directory access, hotlinking of images, and users from reading the wp-config file.
# vi /usr/local/www/apache24/data/.htaccess
    (1)    Options -Indexes +FollowSymLinks
    (2)  
    (3)    <IfModule mod_rewrite.c>
    (4)    RewriteEngine On
    (5)    RewriteBase /
    (6)
    (7)    # Enable Permalinks to work
    (8)    RewriteRule ^index\.php$ - [L]
    (9)    RewriteCond %{REQUEST_FILENAME} !-f
    (10)   RewriteCond %{REQUEST_FILENAME} !-d
    (11)   RewriteRule . /index.php [L]
    (12)
    (14)   # Prevent user enumeration
    (15)   RewriteCond %{QUERY_STRING} ^author=([0-9]*)
    (16)   RewriteRule .* https://www.example.com/? [L,R=302]
    (17)   RewriteRule ^wp-admin/includes/ - [F,L]
    (18)
    (19)   # Prevent includes directory access
    (20)   RewriteRule !^wp-includes/ - [S=3]
    (21)   RewriteRule ^wp-includes/[^/]+\.php$ - [F,L]
    (22)   RewriteRule ^wp-includes/js/tinymce/langs/.+\.php - [F,L]
    (23)   RewriteRule ^wp-includes/theme-compat/ - [F,L]
    (24)
    (25)   # Disable hotlinking of images with forbidden or custom image option
    (26)   RewriteCond %{HTTP_REFERER} !^$
    (27)   RewriteCond %{HTTP_REFERER} !^http(s)?://(www\.)?example.com [NC]
    (28)   RewriteCond %{HTTP_REFERER} !^http(s)?://(www\.)?google.com [NC]
    (29)   RewriteCond %{HTTP_REFERER} !^http(s)?://(www\.)?feeds2.feedburner.com/example [NC]
    (30)   RewriteRule \.(jpg|jpeg|png|gif)$ – [NC,F,L]
    (31)
    (32)   # Disable XMLRPC
    (33)   RewriteRule ^xmlrpc.php$ "http://0.0.0.0/" [R=301,L]
    (34)
    (35)   # Restrict access to plugins and themes php files from unauthorised users
    (36)   RewriteCond %{REQUEST_URI} !^/wp-content/plugins/file/to/exclude\.php
    (37)   RewriteCond %{REQUEST_URI} !^/wp-content/plugins/directory/to/exclude/
    (38)   RewriteRule wp-content/plugins/(.*\.php)$ - [R=404,L]
    (39)   RewriteCond %{REQUEST_URI} !^/wp-content/themes/file/to/exclude\.php
    (40)   RewriteCond %{REQUEST_URI} !^/wp-content/themes/directory/to/exclude/
    (41)   RewriteRule wp-content/themes/(.*\.php)$ - [R=404,L]
    (42)
    (43)   # Prevent Script injections
    (44)   RewriteCond %{QUERY_STRING} (<|%3C).*script.*(>|%3E) [NC,OR]
    (45)   RewriteCond %{QUERY_STRING} GLOBALS(=|[|%[0-9A-Z]{0,2}) [OR]
    (46)   RewriteCond %{QUERY_STRING} _REQUEST(=|[|%[0-9A-Z]{0,2})
    (47)   RewriteRule ^(.*)$ index.php [F,L]
    (48)   </IfModule>
    (49)
    (50)   # Protect wp-config.php from user access
    (51)   <files wp-config.php>
    (52)   Require all denied
    (53)   </files>

- Prevent execution of php scripts in the uploads directory
# vi /usr/local/www/apache24/data/wp-content/uploads/.htaccess
    (1)    # Disable php file execution
    (2)    <files *.php>
    (3)    Require all denied
    (4)    </files>